After posting some of my Art Nouveau furniture that I am creating with the help of my laser cutter, a few people asked for a step by step. I plan to try to film it one of these days but in the meantime, here are a few pics behind the scenes on a cabinet I made recently.
The first step is poring through my research pics. I use photos I have taken on my travels and Pinterest to collect inspiration. I usually end up with elements from a couple antique pieces that I combine into a final design.
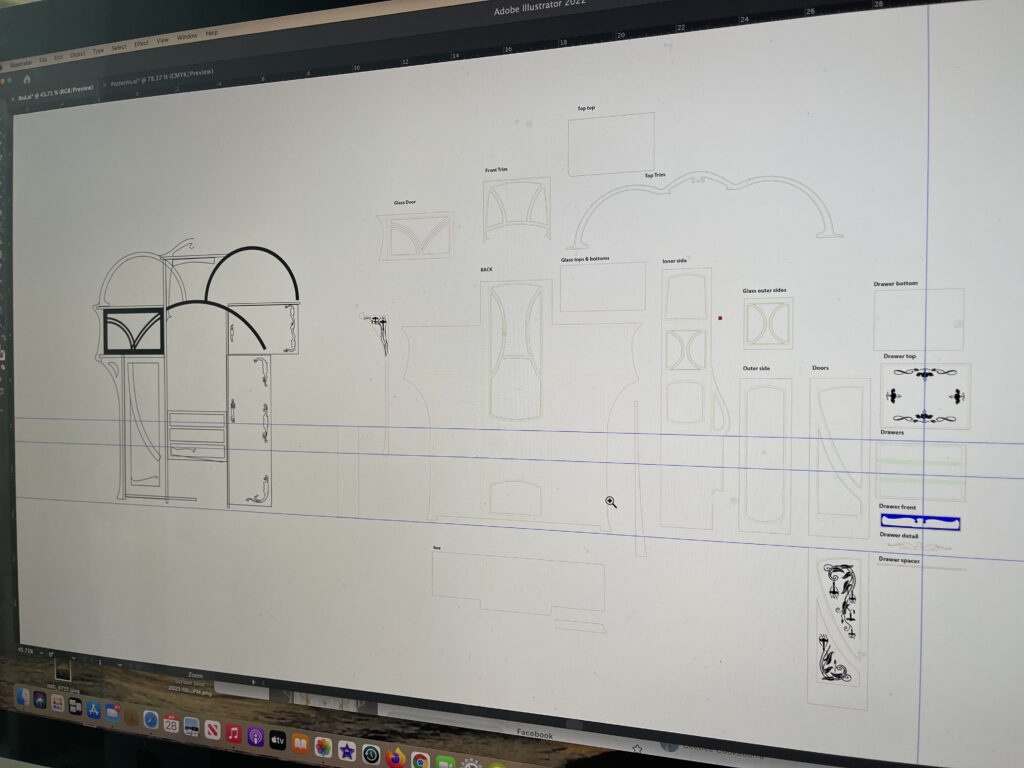
I will spare you the pencil sketches, they are very rough and I usually toss them after I create the vector files. This first pic shows the progression of the vector work (different cabinet that I am currently working on not the one pictured in the rest of the pics)
I start by recreating my pencil sketch so I can make sure the whole thing is balanced overall, then I begin the laborious task of imagining it exploded into individual parts. This takes a long time on these complex pieces. Once I am fairly sure it is right, I do a test print on a cheap material that is the same width as the final material I use.
I test build that piece usually without any ornamentation since I just want to make sure the pieces fit together properly the way I had planned. Believe me, anything more that 5 or 6 pieces it is never right first time LOL. I will discover that I need an extra fraction of an inch somewhere or realize I forgot to include some critical little affordance in order to build it.
Below you can see in the first pic the test build of the current piece I am working on – it is a hot mess and revealed all the errors in my thinking and for some reason the scale is off and it is huge LOL This is the most complex build I have tried. Once I adjust the vector file, I start adding all the embellishments and engraving, this really brings the piece to life and looks so much more authentic. I color code all the lines red for cut, blue for engrave and green for score, before sending the file to my laser to cut it all out for me. To be honest this whole process from research to final vector file, takes a really long time, it can be days or weeks depending on the complexity of the design.
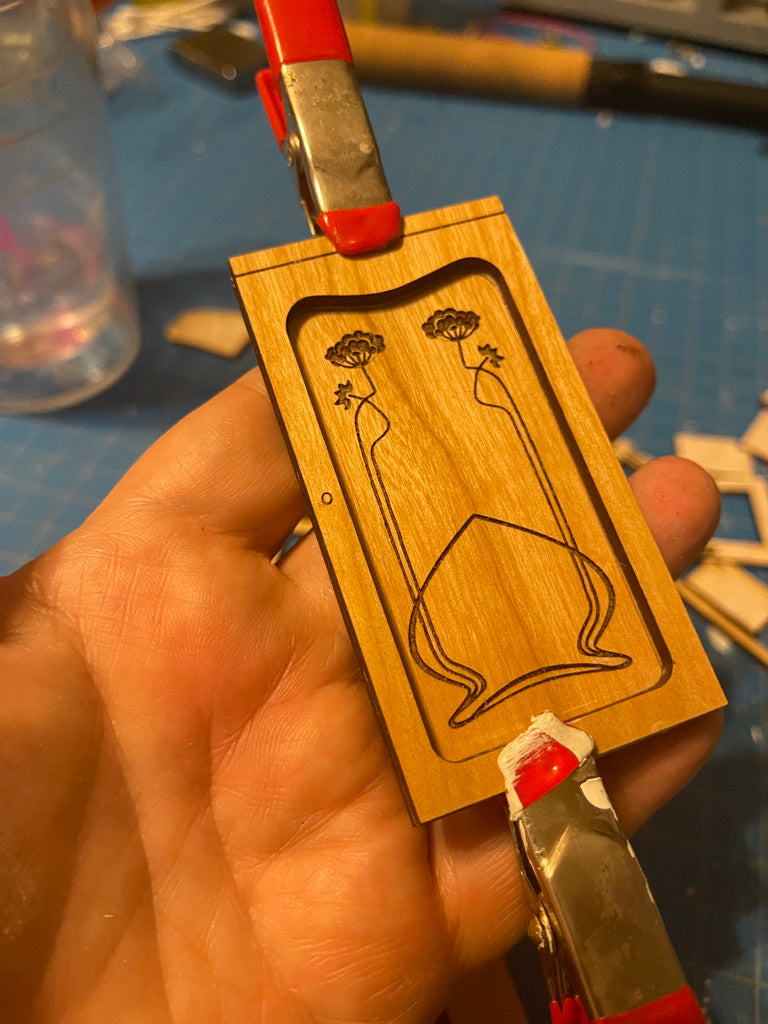
Second pic is all the pieces for the cabinet I built last week. This one is in cherrywood plywood. I decided to use that for my Art Nouveau house because the color is great to show of any engraving and it is already finished which means I don’t have to paint each individual piece like I normally do. However it does add a couple steps so I am not sure this was as much of a timesaver as I originally thought….
First off I need to peel off the protective layer, apparently the laser cutting community calls this weeding. You can see I add score lines to help me line things up when I glue it. The other minor irritation is glues don’t stick well to the pre-finished surface, so I need to scratch some of the finish off to ensure a good bond… You can see why it might have been easier to just stain and shellac the damn wood myself – But I am on this path now and will continue for this project.


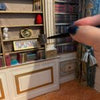
It is then time to glue the pieces together. I typically start with the inner structure and move outwards. Or if some pieces are layered like the doors, I will assemble those first. I have tons of little clamps on hand to keep things together while drying. I use a few different glues, wood glue, super glue, epoxy when needed – see my material list depending on the need. For instance super glue makes acrylic get cloudy so don’t put that anywhere near your windows LOL


I try to glue delicate parts together before attaching to main piece. I think it is easier to line things up and keep them straight.
First time I build anything I almost aways discover a better way to do it next time. And as Bob Ross liked to say, “no mistakes, just happy accidents” Things do go wrong and I prefer to make the best of it rather than start over if I can.
For instance the main cabinet door was just a teeny bit narrower than intended – or perhaps I didn’t glue the sides as straight as I should have…. whatever the case, it was too loose to glue. So I cut a piece of the cheap test material to the correct size and glued it in place before adding the actual door. Looks more dimensional and I am happy with it. I had not intended to have opening doors on this one anyway so no big deal
I normally use card stock for my furniture – much easier to work with because mistakes are easy to fix LOL
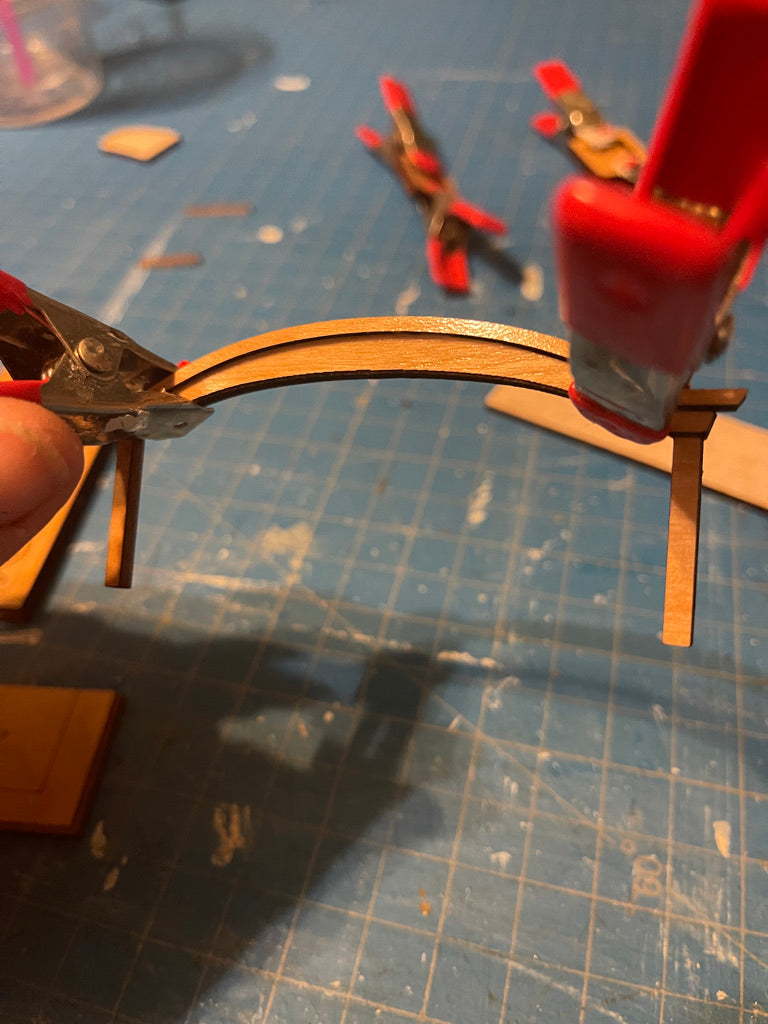


Finally, I cut a piece of cherry veneer and glued it to one side of the cabinet top, once it bonded I gently curved it over and glued the other side. This part is unfinished wood so I will have to add some polyurethane later.
Just have to clean/touch up and add door handles and this one is ready to go! I really should get busy building the actual rooms to put all this in hahaha…..
I do plan to offer some of these as kits at some point – seems like such a waste to pour so much time and effort into this for the one piece I need for my dollhouse project. However I will need to finesse them a little so there are no “happy accidents” and write instructions.
I thought I might offer them in the cheaper draft-board for those who want to paint their own, the more expensive plywood like the pics which come in several finishes like walnut, cherry and maple and possibly as finished pieces for those who don’t enjoy the building process as much as I do
Please let me know what you think or if you have questions on my process ![]()