A bed fit for a Queen
This was one of the first things I made for this dollhouse even though I had no actual house yet. I had so much fun making it that I didn’t take many progress pics unfortunately. I will do better next time LOL
It started with me gathering together a range of materials and trim that I wanted to use in the bedroom, creating a palette to work with.
The mattress itself is just a block of Styrofoam cut to size. I made the headboard from card stock and decorated with some resin embellishments from my silicone molds


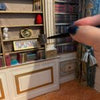
You can see here the process of using the molds, then trimming out the pieces I wanted, before gluing them to card and painting gold
I upholstered it in the satin floral fabric and added some gold cord trim, before gluing that to the block of styrofoam.
For the bedding, I started by adding the heavy fringe to the sides to look like a skirt, then I ruched the blue velvet fabric and glued it to the bed, covering the seam with some pretty gold lace
I cut a panel of the floral satin to size and glued it down in the center. I decided to add gold rope and tassels to the ruched areas, before gluing down the thick braided blue trim
I made the bolster from a dowel, wrapped in foam and satin fabric with gold trim and tassels to match. Then I set the whole thing aside to focus on building the house, since I wasn’t sure what the bedroom dimensions would be yet LOL
Several months later, I pulled it down from The Shelf of Waiting and decided it wasn’t glam enough so I decided to build a half canopy to make more of a statement
I started by pleating this lovely sari fabric for the back wall, which was card stock mounted to some light plywood for strength – I knew all these drapes would be heavy. I use a block of old Styrofoam from packaging for pinning the fabric over dowels or fat straws and then misting with a couple coats of hairspray – the old school 80s kind!
I glued the fabric and the canopy in place, added a fabric covered piece of card for the canopy ceiling, made a swag for the front of the canopy, before starting work on the drapes Pro tip: Remember to add trim before you pleat!


I glued the raw edge of the drapes to the back of the canopy wall and the top edge to the canopy trim
On the home stretch now! I added tasseled trim tiebacks to the curtains before adding some decorative details like tassels on gold cords and sweet satin flowers. The final touch was white feathers in the corners – just like Marie Antoinette’s bed
And done – fit for a Queen and certainly the fancy lady of this house.
Hope you give something like this a try. Let me know if you do ![]()