When I made my first dollhouse I was making it all up as I went along, so when it came to lighting I, of course, decided to make my own. I wanted big glamorous french style chandeliers and the really good ones online were so expensive…. I just couldn’t justify the cost.
So I experimented and I liked the end result so much I just continued making them this way – might not be the right way to do it – but it is my way LOL.
Materials
You will need a few things on hand and on average of 3-4 hours to make one like this. Everything I personally use should be in the materials list here This tutorial is just making the chandelier itself I don’t cover soldering process. This tutorial also assumes you have some basic tools and knowledge of bead jewelry making
Crystal beads in various sizes
Jewelry findings
Coffee straws
String of fairy LED lights
Glue
Pliers
Flush cutters
Step 1
Cut 9 lights out of your roll of fairy lights keeping them all attached in one strand. Cut a piece of wire about 7 inches long. Pick out some findings from your stash – one large circular one and 8 matching small caps.


Step 2
If you look closely you will see three wires – you only need two – positive and negative. The wire that isn’t connected to the light is the redundant one. Start by snipping the third wire by each light and pulling out the wire using your pliers. Keep the wire scraps, you will use them later.
You should be left with your stand of lights with two wires. The wire on the end is ready to become your first candle but all the others need to be bent and twisted first


Bend the wire at each light and crimp it in tightly – imagine that this will be the flame on top of your candle. Twist the wire together 4 or 5 times. Should be about half an inch (or whatever size candle you would like)
Step 3
Take a coffee straw and using your exacto knife, slice it from top to bottom so it opens lengthwise. Then cut it into 8 equal pieces of about a half inch long. These are your candles. Take your sliced candles and slide them onto the twisted wire leaving the LED poking out the top. Bend the wire up on each side to keep it in place. You should be left with 8 candles and one exposed LED at the end. Ready to be installed onto your larger circular chandelier base.


Step 4
Get your super glue and accelerant at the ready and your large circular jewelry finding that we will use as a base. I buy bulk assortments of cheap filigree so you never know exactly what will be in there but the one pictured was perfect! A little less than 2 inches in diameter with lots of holes and a pattern with 8 points, hence the 8 candles. Now of course you can do as many or as few candles as you like – whatever works for the findings you have on hand. You can see I use all sorts of shapes to make my lights.


There are a couple ways to do this – either glue your little candle cups to the base then glue in your candles or glue your candles into the cups and then onto the base. Either way will work for you. The important thing is the accelerant and keeping your fingers out of the way LOL
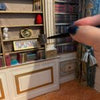
Super glue doesn’t bond instantly and I quickly discovered that holding these tiny things together long enough without moving was well nigh impossible. I basically stuck my fingers together more than the pieces of my chandelier at the beginning. The best technique is to spray one item with your accelerant – for instance the base. Then add super glue to your other piece for instance the candle. Then place the candle on the base holding from the top. The accelerant makes it bond instantly while your fingers are nowhere near this lovely chemical reaction and hopefully you still have your fingerprints LOL. You can see in the image that I usually place a little piece of plastic underneath to save my cutting mat from being stuck to my chandelier base. Rookie mistake that I will never make again ![]()
But what about all the ugly wires you say? Just carefully tamp them down with your tweezers. On simple chandeliers, I paint them so they are less noticeable but on the complex ones I don’t bother since you cant see them.
FInally use your exacto to scrape the silver coating off the end of the wires to expose the copper underneath (no photo since I didn’t have enough hands) What I love about the fairly lights is they are insulated so you can cross wires, have them next to metal etc without worrying about shorting out your lights. However you need to scrape that coating off to test them – which is pretty footery (Irish slang not sure if it translates LOL). Now that you know they all light up properly we can move onto the fun stuff!
Step 5
Okay remember that piece of wire from step one? Well using your pliers make a small loop on one end. Then grab one of your wire scraps and a teardrop bead. Since these beads are drilled from the side you can’t use a standard ball pin so this wire works well. Insert the end of the wire and twist the ends together making sure the bead has enough room to dangle. Add a crystal bead, make a loop with the wire and attach to the larger wire loop. Twist the wire around the top bead a couple times and snip off using your flush cutters. Again make sure that it dangles and is not too tight and stiff.


Now add a couple of bead caps and a half inch bead. I have a large stash of beads – sometimes I use a wood bead that I paint gold or a fancy crystal bead that I like or in this case a pale lavender bead. I decided a little subtle color would be nice but it is totally up to you. I put one more bead cap on top and them slot the wire through the center hole in the chandelier base.
Step 6
This is optional but this is what I use the 9th LED for – you can totally skip this if it is too much of a pain in the ass LOL – it is super footery to do and the chandelier will still look great without it. I have bead cups that look a little like a lotus flowers that I love and glass beads with subtle color cast. I like to spread the petals of the lotus so that the glass bead fits into neatly. Wrap the LED wire around the central wire a bunch of times so the 9th light is right in the bead cap then add your glass bead. It is better to put the LED wires through first then the central wire. Push it all down neatly. This not only serves to hide some of those wires that I am not going to paint for this one and shines a little extra light at the base through the bead cap and glass bead. Top it all off with a few more bead caps and beads to your liking.


Step 7
Time for the fun beadwork – making all the embellishments. First things first, I discovered that my banana hook was way more useful as a chandelier holder than for hanging bananas LOL Twist the top of the central wire into a hook and hang that baby up. One more test to ensure all the lights still work and that you didn’t break a wire – they are very strong up to a point but too much bending can cause breakage – better to find out now!
Using a ball pin add a few beads for the long drops around the central long drop. I chose to add a little color accent but you don’t have to. I put a crystal rondele bead, a lavender onion bead, then a 3mm crystal bicone and two 2mm bicones. Make a loop with your pliers – cut off the end with your flush cutters and then make 7 more ![]()


Your base might be different so pick spots on it that will let you add these drops evenly in a circle around the central drop. Just make sure they have enough space to hang unencumbered and I like then to be a little shorter than the central drop which should be the longest. You can see in the photo, I chose the flower points that were about a quarter inch away from the center hole
Step 7
Once you get all the inside drops installed it is time to make the outer ones. I chose to add teardrops, so used the wire scraps again and a selection of crystal and glass beads. You can use whatever makes you happy ![]() When using the wire scraps it is still important to make a loop so they dangle properly. I like my chandeliers to move -not be stiff and glued in place. Install your eight outer drops evenly around your base.
When using the wire scraps it is still important to make a loop so they dangle properly. I like my chandeliers to move -not be stiff and glued in place. Install your eight outer drops evenly around your base.


Again, you could stop here – press the wires down, paint them and the wooden beads with a little antique gold and boom – a very pretty chandelier ready for install. However I am going to keep going and show you some more of my chandelier techniques ![]()
Step 8
If you are still with me, good job you are a true mini fanatic LOL . This is usually the point where I start questioning my life choices because this is a pain in the ass and very footery!
Take a piece of waxed thread and a beading needle and tie a few knots to the first spot on the base. Pick places that are evenly distributed around the circle. In this instance, in between the candles was a handy loop just waiting for embellishment. Sometimes I just add more drops but for this one I am adding the draping crystal swags up to the top. I like to use a gradient of bead sizes for this – larger at the bottom, tiny at the top. In this case I used a small gold bead cap, one lavender glass bead, three 4mm bicones, three 3mm bicones, five 2 mm bicones and three 1mm bicones. This will vary depending the height of your chandelier your beads maybe a little different than mine. Just do a little trial and error to see what works for you. The important thing is that it not be taut – there should be some drape to these swags. Don’t worry it will be all off kilter till you are done.
At the top make sure you have a bead cap that has holes around the edge so you can tie your thread to it. This one only had six holes and I needed 8 swags so I used a couple of the holes twice.
At the top, tie a couple knots then add your beads in reverse – start with the small ones and go up to large then tie off on the base. Sorry I don’t have good photos I only have so many hands LOL… I was using them all along with my teeth ![]()


Once complete, trim off any excess thread and voila you have a gorgeous chandelier ready to be installed….. except you could do more, if you really wanted to ![]()
I added a topper – another circle of small drops to the top. (I am sure there are proper names for all these parts but I was too lazy to look it up )Take a flower shaped jewelry finding, preferably one with holes already, but, if not – go ahead and punch holes in each petal using your hole punch:) Make some small gradient drops and add one to each petal. Add the topper to the top – where else, right? and glue it in place. And you are done…. Or you could be super extra and do some more like I did ![]()
Step 9
I have no in progress pics here because all my fingers and toes were involved! Using the same technique for the draped swags, tie some thread to the base and add beads to make a swag around the circumference of the base. This will again vary depending on the size of your base.
In my case I added three 1mm bicones, two 2 mm bicones, one 3mm bicones, two 2 mm bicones and three 1mm bicones. The important thing is to keep it short enough to not interfere with the outer ring of drops.
And now that really is it! With these techniques you can make all sorts of lovely lights for a fraction of the cost. Install into your fabulous dollhouse and admire your work of art!
If you try it please let me know how it turned out for you – I would love to see pics ![]()