These cute little side tables were so easy to make and I really liked the end result. I put mine in the dressing room and Music room of La Maison Tordue.
I started by drawing out a template for the base and finding some circular rug photos online that I liked. You can print mine out here if you would like. I also cut circles out of PVC foam and card stock.

I went through my beads and jewelry findings stash and picked out a bunch of beads that I liked when stacked
Step 1
Cut out two circles – one in PVC foam and one in cardboard. The PVC foam should be a tiny bit smaller. Sand the PVC foam to get a smooth beveled edge. You can also double up the card stock circles if you prefer a thicker edge. Cut one more smaller circle from PVC foam. Glue them all together
Step 2
Cut out two bases from PVC foam. One a little larger than the other. Then one of the larger bases out of card stock. Glue all three together
Step 3
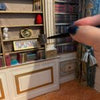
Cut a piece of 16 or 18 gauge wire (toothpicks would also work just make sure the beads can slip on easily) and stick the wire into the middle of the base you just made
Step 4
Add your chosen beads by adding a dab of glue to the base around the wire and slipping the first bead down and let it set. Rinse and repeat till your table is the height you want. Let it dry completely
Step 5
Place your table top upside down on your work surface and flip your table leg over and glue to center of the bottom side of the top. If you left a little wire sticking out make sure it doesn’t pierce the top surface of the table. Let it dry completely
Step 6
Paint your table to match your decor – In this instance I used a faded blue with gold accents. Once dry glue your chosen table design to the top and spray with clear coat.
Honestly you could hand paint the table or do decoupage on it what ever you want

As you can see from this pic I hadn’t sanded my edges yet – rookie mistake ![]()
Much easier to sand all your pieces first before gluing. Learn from my mistake please LOL
Here you can see the tables painted and with the “rug” pattern glued on. I added the gold accents once it dried and sprayed the whole thing with crystal clear


This was my first tutorial so I hope it is clear enough. Let me know if you try it